
Stop chasing invoices.
Start getting paid.
Try the #1 AR Automation for Xero and QuickBooks Online.
Learn more - Try it Free


If you've ever tried to send statements by post from Xero, you already know the problem: Xero doesn't have a "mail this statement" button. The workflow most businesses end up with looks something like this — open Business, click Invoices, click Print Statements, pick your date range, pick your customers, click Print, save the PDF, open your email, attach the PDF, send it to the office printer (or the print-and-mail provider), repeat on the first of every month, forever.
It works. It also takes half a morning, and it's the first thing that falls off the list when someone goes on leave.
Paidnice removes that workflow entirely. If you're already using Paidnice for reminders and late fees on your Xero ledger, you can configure it to automatically send customer statements to a destination of your choice every month — including a print-and-post provider — without touching Xero at all.
This post walks through exactly how to set it up, why the "override destination email" feature is the piece most people miss, and how customers are using it to fully outsource their monthly statement run.
Most Xero users we talk to still have a subset of customers who genuinely prefer (or require) a printed statement in the mail. Usually it's one of three situations:
The customer is older, doesn't check email reliably, and pays promptly when a paper statement lands on their desk. Chasing them by email produces nothing. A printed statement produces a cheque in two weeks.
The customer is a larger organisation with an accounts payable team that processes physical mail. Their AP clerk needs a paper statement to match against invoices and cut a payment run.
The customer simply has no email address on file in Xero. You've been meaning to collect one for two years. It hasn't happened.
In every case, a reminder email solves nothing. What you actually need is a statement, on paper, in an envelope, posted reliably on the same day every month. And you need it to happen without anyone on your team remembering to do it.
If you search "send statement via post xero," the answer you get is essentially: generate the PDF inside Xero, then print and post it yourself.
Here's the actual Xero flow for reference:
This works for a one-off. It doesn't scale. Xero itself notes that the platform primarily supports emailing statements directly — posting is left to you. So the question stops being "how do I print from Xero" and starts being "how do I make this a recurring, hands-off process."
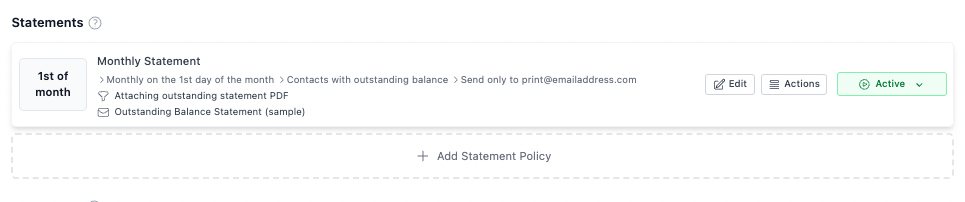
Paidnice sits on top of your Xero account and handles the enforcement layer — late fees, reminders, statements, and collections — on a schedule you define. For statements specifically, you set up a Statement Policy that controls:
That last point is where the post-by-mail workflow lives.
Inside any Statement Policy in Paidnice, under More Options & Filters, there's a field called Override Destination Email. When you set this, the statement PDF is emailed to that address instead of the customer's email address in Xero — even if the customer has no email on file.

This one field is what enables the post-by-mail automation. You point it at:
Because the override is set at the policy level, you can run two policies side-by-side: one emails statements to customers who have email addresses, and another posts statements (via the print-and-mail route) to customers who don't — or who you've tagged as "post only."
Here's the short version, assuming you already have Paidnice connected to your Xero organisation:
Once it's live, you'll see each run appear in your Paidnice action queue — scheduled, then complete — exactly like any other automated action. You can pause, reschedule, or override individual sends from there.
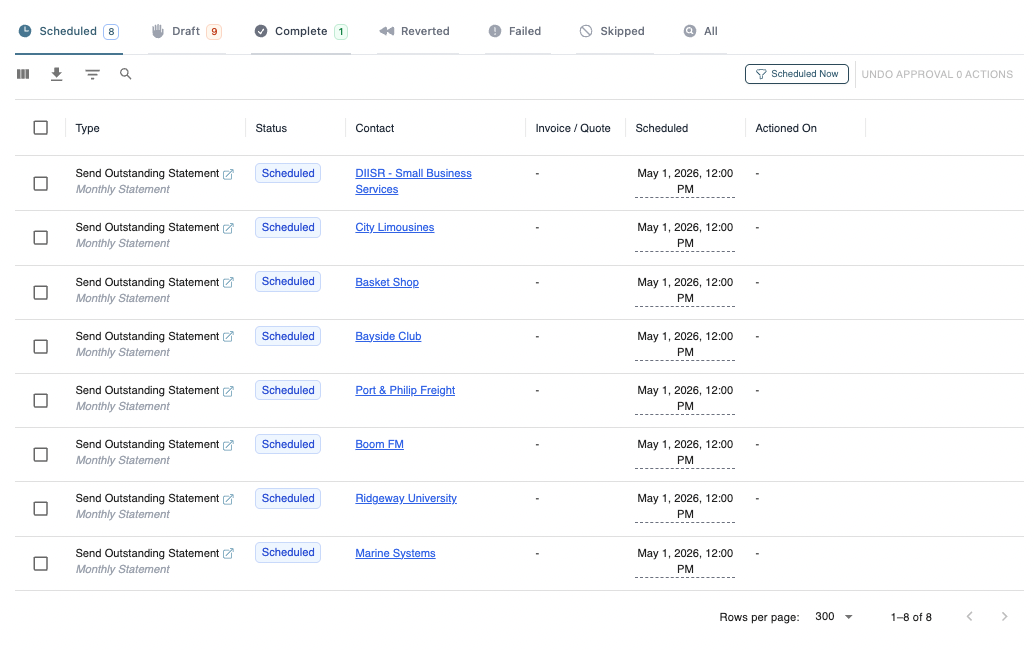
The setup worth flagging: if you use a third-party print-and-mail provider, they'll often also handle the envelope, postage, and sorting. You send the PDF, they post the letter. For a business with a hundred or more paper-statement customers, this removes the whole "someone in the office prints and stuffs envelopes on the first Monday of the month" ritual. Paidnice sends the PDF on schedule, the provider posts the letter, your customers receive their statement, and you get paid — without any member of your team touching the process.
If you're currently doing any of the following, this is the feature that kills the workload:
The override destination email is one piece of a broader pattern in Paidnice — you can run the same logic for reminders, late fee notifications, and overdue letters. If you have a customer segment that needs everything by post (rare, but it happens in some industries), you can set up the full sequence — friendly reminder 3 days before due, due-date reminder, 7-day overdue letter, final demand — all routed through your print-and-mail provider, all automated.
For most Xero users, the statement run is the biggest monthly time sink. Automating that first, then layering in reminders, is the usual path.
If you're already on Paidnice, the override destination email field is in every Statement Policy under More Options & Filters — you can turn this on today. If you're not, Paidnice connects to Xero in about two minutes and the statement policy is one of the first things most new customers set up.
The goal isn't just to send statements. It's to stop thinking about sending statements.
Request an AI summary of Paidnice